| ||||||||||||||||||
Plans and DesignWe chose the house because we liked the lot, the layout of the house on the lot and the light that came in through most of the windows. However, the main part of the house was quite a mess. The House LayoutThere appeared to have been several remodels since the house was built in 1953. Part of the back patio was glassed in to create a "solarium" outside the living room. At least two additions were made to the main area, creating a family room and game room and a master bedroom with two bedrooms upstairs. None of the remodels appear to have reworked any of the existing house, but just tacked new rooms onto the existing plan. You went through five doors to get from the garage to the kitchen! 
Above you can see the original floor plan (for the downstairs). If you're really interested, you can download a PDF drawing. The architect on this job was Richard Morrison and he did a specacular job of finding a workable floor plan for the house out of this mess. We left the master bedroom, right side and upstairs floor plans as is, but reorganized the central part of the house completely. We ended up tearing down the solarium, opening up the back yard to the living room. Also, we extended the exterior wall a bit to make more space in the kitchen. Other than that, we left the exterior walls as they were. 
The major changes can be seen by comparing these two floor plans:
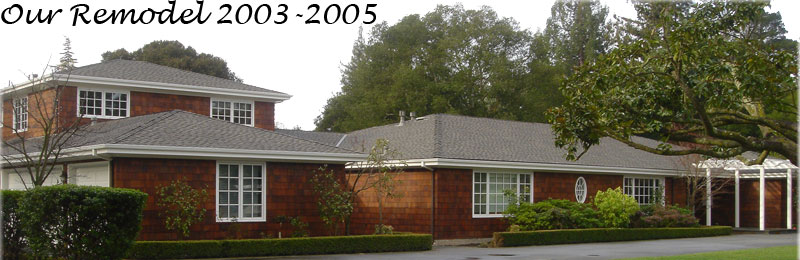
You can also download a PDF drawing of the final ground floor plan. The InteriorWe started out planning to leave the interiors alone for rooms where we were not changing the layout. However, problems with existing wire and moisture under the old part of the house and execrable taste in decorating the master bedroom eventually caused us to redo the entire interior. Aside from the confused floor plan, many of the central rooms had sloping ceilings. We wanted flat ceilings instead and we raised them as high as we could given the original roof line. The living room ended up with a 10' coffered ceiling and the kitchen and family room ended up with 9' ceilings. The dining room and library ended up with 8' soffits around the perimeter and slightly higher ceilings in the center. The ExteriorOriginally, we were going to leave the exterior alone and just replace the doors and windows. When we looked around at other houses in the neighborhood, we found that we liked ones with shingles and with the urging of the architect, we decided to replace the stucco. We also ended up replacing all the doors and windows, creating an elegant and consistent look for the whole house. Here is a QuickTime VR movie of the outside (34Mb). The ShopIf you found this site, you probably know that John has a lot of hobbies and many of them involve working in his shop. Of course, our new house needed a great shop. We gained some square footage allowance from tearing down the solarium and used it to fit in a 900sf shop to the right of the main house. 
On the right is the original shop layout I drew in designing the shop. This is pretty much an expansion of the shop at my previous house, but this is my third shop and I learn things through using each one. Again, a PDF drawing is available. The main shop area is 25' x 26', which makes a generous shop floor, especially since my previous shop floor was only 20' square. The main thing I did with the extra space is build a central work table for standing work and a large bench for seated work. The most useful tools in the shop can be spaces to work! At the top left is a small bathroom and a closet, accesible from the outside. These are useful both when working in the shop and when people are outside around the pool. I also wanted a separate storage room. The dust collector and air compressor are located in the storage room to reduce background noise in the shop itself. Also, several rows of shelving help keep the shop organized. This time, I put the paint booth in a separate room. In the last shop, the paint booth opened into the main shop, which made dust a constant problem. I would try to sweep up the shop before painting, but inevitably something would be picked up and end in the paint. (The paint booth has an inner door made up of furnace filters to clean the fresh air coming in.) The wood storage slot is also a new idea for me. The cubby hole allows sheet goods to be stored on their sides and stick lumber can be stored in racks above. The ceiling in the back rooms is 8' high, while the main shop has a peaked ceiling that matches the roof line. This also creates a loft storage area over the back part of the shop. Much more storage was designed into this new shop and its already paid off in improved organization. I actually can hope to keep this shop tidy! | ||||||||||||||||||
|
Remodel Calendar | ||||||||||||||||||